


This topic describes how to change the default endpoint policy for privileged endpoints that is applied by Forefront Unified Access Gateway (UAG) when publishing Outlook Web App. The default privileged endpoint policy is called OWA Private Computer and is defined such that Forefront UAG automatically identifies all clients as public endpoints and sets the security settings on the Outlook Web App logon page to This is a public or shared endpoint. To allow users to select This is a private endpoint, you must change the policy.
 To modify the OWA Private
Computer endpoint policy
To modify the OWA Private
Computer endpoint policy
-
In the Forefront UAG Management console, click the trunk through which you published Outlook Web App. In the Trunk Configuration area, click Configure.
-
On the Advanced Trunk Configuration dialog box, click the Endpoint Access Settings tab.
-
In the Privileged Endpoint Policy area, make a note of the endpoint policy in use (by default it is OWA Private Computer) and click Edit Endpoint Policies.
-
On the Manage Policies and Expressions dialog box, select the policy used for the privileged endpoint policy, and click Edit Policy.
-
On the Policy Editor dialog box, click Manage Windows Policies.
-
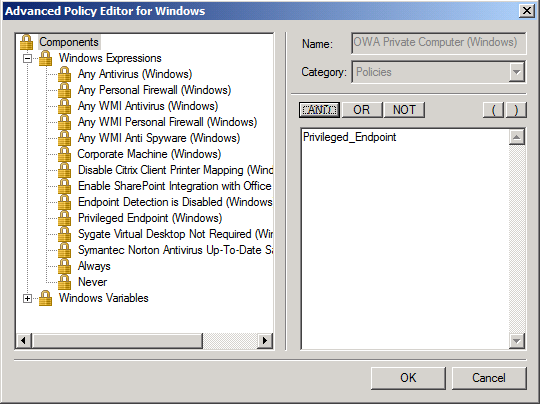
On the Manage Windows Policies and Expressions dialog box, select the policy used for the privileged endpoint policy with (Windows) appended, for example OWA Private Computer (Windows), and click Edit Policy.
The Advanced Policy Editor for Windows dialog box appears.
-
Delete the existing variable Privileged_Endpoint.
-
Make changes to the policy as required. For example, to create a policy that defines privileged endpoints as those with an up to date Microsoft Forefront anti virus product and a Windows 7 personal firewall installed and running, do the following:
- Under Components/Windows Variables, expand
Anti-Virus, expand Microsoft/Forefront, and then
click Up To Date.
- On the Advanced Policy Editor for Windows dialog box,
click AND.
- Under Components/Windows Variables, expand Personal
Firewall, expand Microsoft/Windows 7 PFW, and then click
Running.
- Click OK.
- Under Components/Windows Variables, expand
Anti-Virus, expand Microsoft/Forefront, and then
click Up To Date.
-
On the Manage Windows Policies and Expressions click Close.
-
On the Policy Editor dialog box, click OK.
-
On the Manage Policies and Expressions dialog box, click Close.
-
On the Advanced Trunk Configuration dialog box, click OK.
-
Activate the configuration.