Let UserGate be installed on the computer with an
internal network adapter address 192.168.0.1. There are two ways to
set up DNS in UserGate Proxy Server:
In
Proxy Settings section of UserGate setup
menu, enable the
DNS forwarding option and indicate DNS
server of the provider in the
IP address field. If there are
several addresses, separate them by semicolon
( illustration).
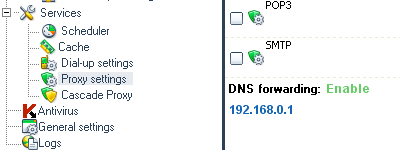
DNS forwarding
|
On users computers, open connection properties. In TCP/IP
properties, indicate the IP address of the internal network
interface of the computer with UserGate as a gateway and DNS
( illustration).
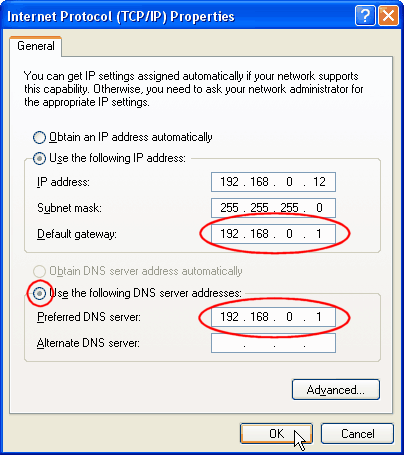
TCP/IP properties
|
Choose section
NAT of UserGate setup menu.
Using the
Add button on the Control Panel or
Add New
option of the pop-up window, launch the dialogue window to create a
new NAT rule. Indicate the IP's of the receiver (local interface)
and sender (external interface). Use port 53 and UDP protocol.
Apply the rule to all local network users. In TCP/IP properties of
the network connection on user computers, indicate the IP address
of the provider's DNS server as DNS, and IP address of the computer
with UserGate as a gateway
( illustration).
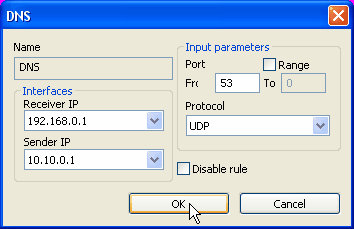
NAT rule
|
In TCP/IP properties of the network connection on user
computers, indicate the IP address of the provider's DNS server as
DNS, and IP address of the computer with UserGate as a gateway
( illustration).
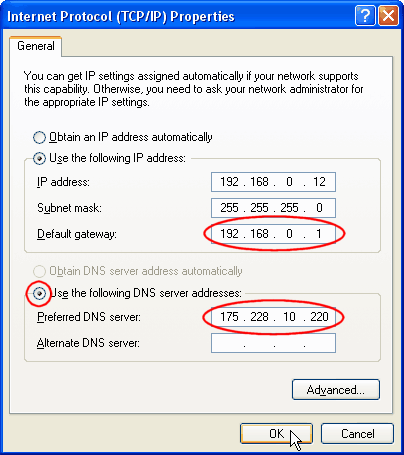
TCP/IP properties
|
In the presence of internal DNS server, it is possible to set up
DNS through NAT: apply NAT rule for UDP port 53 to a user from the
computer that serves as the DNS server. In TCP/IP properties of the
network connection on the user computer, indicate the internal DNS
server.
It is possible to check the accuracy of DNS settings by typing,
for example, nslookup smtp.mail.ru in the command line. If DNS is
set up correctly you will get an IP address.


