To set up ftp client through proxy server, it is
necessary to specify proxy settings in connection properties and
select passive mode. In UserGate, FTP-proxy mode must be activated
(Services on the setup menu, Proxy Settings - FTP
proxy).
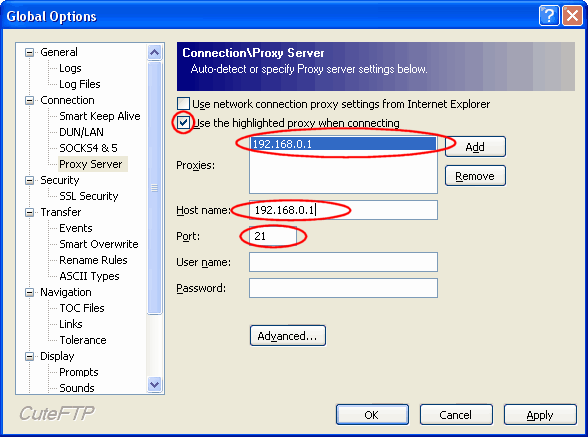
CuteFTP
CuteFTP setup is available in the Global
Settings in the Tools menu. Alternatively, start Global
Settings by pressing Alt+F7. In the Global Settings window
select the Connection group. Further setup can be done either
through Socks 4&5, or Proxy (illustration).
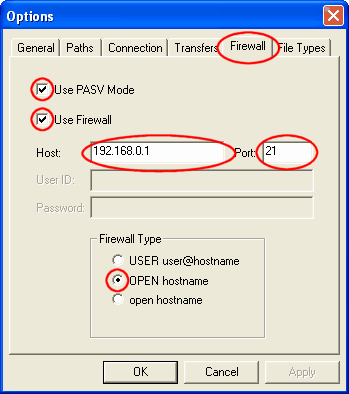
FTP Explorer setup is similar to CuteFTP setup.
Select on the main menu: View - Options - Firewall, enable 'Use
PASV Mode' and 'Use Firewall'. In the 'Host' field specify the IP
address of internal network interface of the computer with
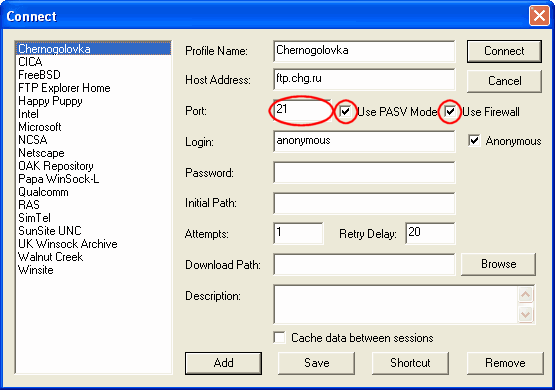
UserGate, port - 21. Then create a new FTP connection. In the 'Host
Address' field specify FTP address of the server to which you want
to connect, and check 'Use Firewall', port - 21 (illustration).
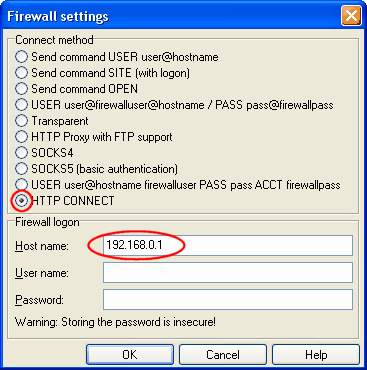
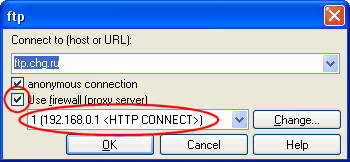
Create a new connection (Net - FTP New Connection
or press Ctrl+N). In the window press 'Change', in the 'Host name'
field specify the IP address of the computer with UserGate. In the
'Connect method' options group it is possible to select, for
example, 'HTTP Connect' option. Press OK, then specify FTP address
of the server, enable 'anonymous connection' and 'Use firewall
(proxy server)' (illustration).
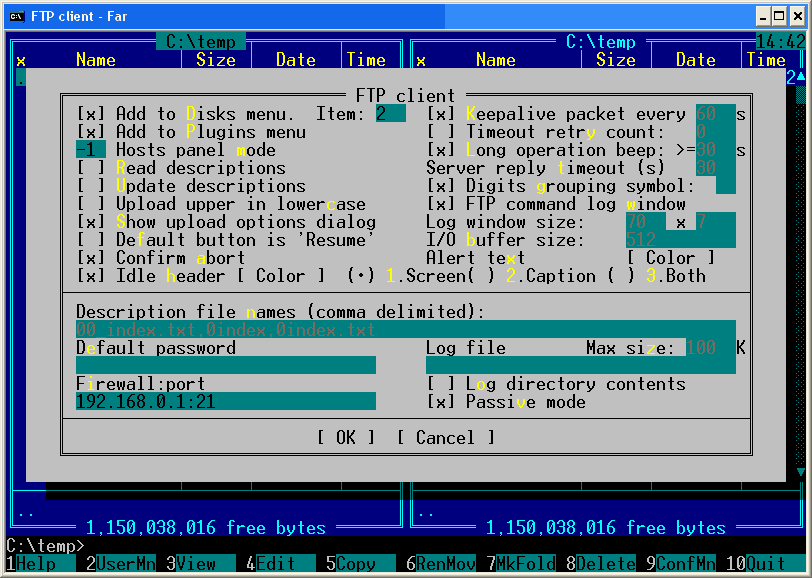
For FTP client setup press F9. Then on the main
menu go to 'Options' and select the 'FTP client' section. In the
menu that appears, in the 'Firewall:Port' field specify the
internal network interface of the computer with UserGate and port
number 21. Then activate 'Passive mode' and create a new FTP
connection (standard shortcut combinations: Alt+F1 - FTP,
Shift+F4). In the settings specify the ftp address and enable
'Using firewall' mode (illustration).


 illustration).